
The Ultimate Guide to Making the Perfect Soy Wax Candle with Fragrance
Hazel FernandezThere’s something magical about lighting a beautifully scented candle and letting the aroma fill your space. Whether you’re crafting candles for yourself, gifting them to loved ones, or even starting your own candle business, making the perfect soy wax candle is easier than you think!
In this guide, I’ll walk you through everything you need to know—from determining the right amount of wax needed to nailing that perfect scent throw. Let’s dive in!
Why Soy Wax?
If you’ve ever wondered why soy wax is such a popular choice for candle-making, here’s the scoop:
✔ Clean-burning – Unlike paraffin, soy wax doesn’t release harmful toxins.
✔ Longer-lasting – Soy candles burn slower, giving you more hours of enjoyment.
✔ Eco-friendly – Made from soybeans, it’s a renewable and biodegradable option.
✔ Better scent throw – When made correctly, soy candles can fill a room with fragrance beautifully.
Now that you know why soy wax is amazing, let’s get started on making your own!
What You’ll Need
Before we start melting wax, here’s your checklist of materials:
Ingredients:
- Soy wax flakes (100% soy for best results)
- Fragrance oil (Make sure it’s candle-safe!)
- Cotton or wood wick
Tools & Equipment:
- Candle jar or tin (Heat-resistant and clean)
- Wick stickers or hot glue (To secure the wick)
- Double boiler or melting pitcher (For safe, even melting)
- Thermometer (Temperature control is key!)
- Measuring scale (To get the wax-to-fragrance ratio just right)
- Stirring stick (A skewer, spoon, or chopstick will do the trick)
- Wick holder (Keeps the wick centered while the wax sets)
Got everything? Great! Now, let’s make some candles.
Step-by-Step Guide to Making the Perfect Soy Wax Candle
Step 1: Measure Your Wax
To measure the wax needed for your container, follow the steps below:
Step 1a: Fill the container with water
- Fill your container with water to the level you want the wax to reach
Step 1b: Measure the water weight in grams
- Measure the weight of the water (in grams) by using a digital scale. Make sure to tare it (zero it out) before measuring the water weight
Step 1c: Convert the water weight to total weight
- Multiply the water weight by 0.86 to account for the lower density of soy wax compared to water
- For example. if the water weighs 200g, multiply 200g by 0.86, which equals 172g of soy wax
Step 1d: Account for fragrance
- If you are not adding fragrance, skip this step
- Fragrance oils are typically added at 6% - 10% of the total weight
- Calculate the wax weight using the formula:
Wax weight = total weight / (1 + fragrance load)
- For example, you want to add 8% fragrance load to your candle
Wax weight = 172g / (1 + 0.08)
Wax weight = 159.26g
Step 1e: Calculate the fragrance oil weight
- Skip this step if you are not adding fragrance
- Use the formula to determine the fragrance oil needed:
Fragrance Oil Weight = Total weight - Wax weight - For example: total weight is 172g and the wax weight is 159.26g
Fragrance oil weight = 172g - 159.26g
Fragrance oil weight = 12.74g
Now that you have measured your wax and fragrance oil, you're ready to melt the wax!
Step 2: Melt the Wax
Step 2a: Prepare the double boiler
- Fill the bottom of your double boiler with a few inches of water and bring to a gentle simmer
Step 2b: Melt the wax
- Add your soy wax flakes to the top pot and stir occasionally
Step 2c: Keep an eye on the thermometer
- Keep an eye on the thermometer—your target melting temperature is 185°F (85°C)
Pro Tip: Melting your wax too fast or too hot can affect how well it holds the fragrance, so take it slow!
Step 3: Add Fragrance Oil

Once the wax reaches 185°F (85°C), it’s time to add your fragrance!
- Stir gently and consistently for 1-2 minutes to ensure the fragrance binds well with the wax.
- Avoid stirring too vigorously as this can introduce air bubbles, which may lead to imperfections like frosting, sinkholes, or an uneven burn in your finished candle.
- Make sure the wax is at the right temperature (around 185°F/85°C) when adding the fragrance for proper binding.
Common Mistake Alert! If you add fragrance when the wax is too hot, it can evaporate, weakening the scent throw.
Step 4: Prep Your Wick & Container

While waiting for your wax to cool to 135-140°F (57-60°C), prep your container:
Step 4a: Clean the container
- Clean the inside walls of the container with a tissue and rubbing alcohol
Step 4b: Attach the wick to the container
- Secure the wick to the center of the jar using a wick sticker or hot glue.
Step 4c: Keep the wick upright
- Use a wick holder (or two chopsticks) to keep it upright
Why This Matters: A properly placed wick ensures an even burn and prevents tunneling.
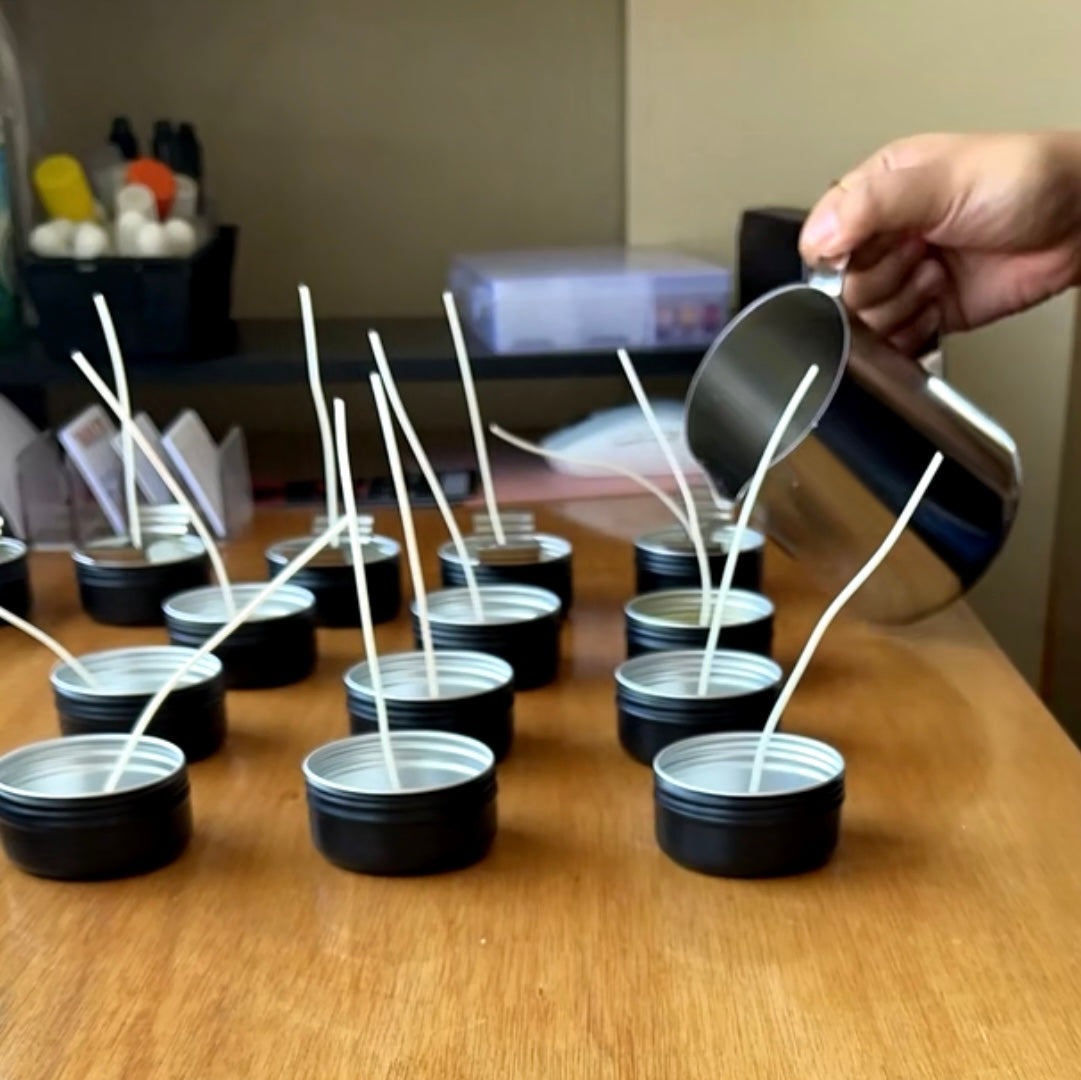
Step 5: Pour the Wax

Now, the fun part! But hold up—temperature matters:
Step 5a: Let the wax cool
- Let your wax cool to 135-140°F (57-60°C) before pouring. Pouring too hot can lead to sinkholes or air bubbles.
Step 5b: Pour the wax into the container
- Slowly pour the wax into the container, leaving about ½ inch (1.3 cm) of space at the top.
Wait for It: Let the candle sit undisturbed at room temperature for 24-48 hours to set properly. For better scent throw, let it cure for a maximum of 2 weeks!
Step 6: Trim the Wick & Light It Up!
Once fully set, trim the wick to ¼ inch (6mm). This prevents excessive soot and ensures a clean burn.
Now, light your candle and enjoy the cozy vibes!

Troubleshooting & Pro Tips
Weak Scent Throw?
✔ Let your candle cure for at least 1-2 weeks before burning.
✔ Ensure you’re using the correct fragrance load (6-10% of wax weight).
✔ Make sure you’re adding fragrance oil at 185°F (85°C).
Tunneling or Uneven Burning?
✔ Always let your candle burn until the entire top layer is melted (this prevents tunneling).
✔ Make sure you’re using the right wick size for your container.
Sinkholes or Rough Tops?
✔ Pour the wax at 135-140°F (57-60°C) for the best finish.
✔ Try a second "top-off" pour after the first layer sets.
Final Thoughts: Your Candle-Making Journey Starts Here!
And there you have it—your very own handcrafted soy wax candle! Whether you’re experimenting with different fragrance blends or making candles for sale, the key is patience, precision, and practice.
So, what scent are you trying first? Let me know in the comments! Happy candle-making!